
In the Marcq St Hilaire method, a calculated zenith distance or altitude is compared with the observed zenith distance or altitude to obtain an intercept which is plotted from a DR position in the direction of the body’s true bearing. In explaining this method, the altitude and not the zenith distance will be used. The following formula is used to calculate the “ calculated altitude”:
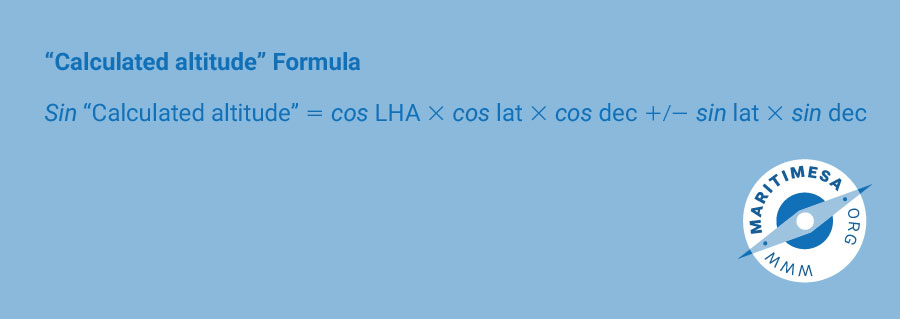
If the name of the declination is the opposite to that of the latitude then the second part of the formula is subtracted from the first. If they are the same then it is added to the first.
Procedure. The procedure to follow when using the Marcq St Hilaire method is the following:
- Prepare a sight reduction work sheet as indicated in the annexure marked “MARCQ ST HILAIRE”.
- Unless universal time (GMT) is used, the first action is to convert the zone time when the sun sight was taken to GMT. (Remember that GHA and Dec are tabulated against universal (GMT) time in the Nautical Almanac).Complete the first part of the pro-forma market as “1”.
- Using the GMT of the sight, look up the hour value of GHA and declination on the day in question in the nautical almanac. At the same time note the change of declination with the increase of time and the average hourly variation of the declination at the foot of the page. Write these values in the appropriate sections marked as “2” and “3” of the pro-forma.
- Turn to the back section of the nautical almanac to the tables headed “INCREMENTS AND CORRECTIONS”, and in particular to the table covering the particular minute of time of the sun sight. The extreme left hand column of the table gives the seconds of the minute in question from 00” to 59”. Look up the value in the column marked SUN PLANETS next to the appropriate second of the minute and write it next to “Increment” (section 2) on the pro-forma. Since it is an increment, this value is always added to the hourly value of the GHA. This will give the corrected value of the GHA at the time of the sun sight.
- Once the corrected GHA is obtained, the value of the observer’s DR longitude is written in the appropriate space of section 2 of the pro-forma and either added (if east longitude) or subtracted (if west longitude) from the GHA. If the resultant value is a minus quantity (-), then 360° is added to obtain a positive value. If the resultant value is greater than 360°, ten 360° is deducted. The result will be the LHA.
- On the same page of the “INCREMENTS AND CORRECTIONS” go to the columns marked “v or d corrn”. In the column marked “v or d” look up the hourly difference of declination that you obtained under sub-paragraph ‘ b’ above. Next to this value in the column marked “corrn” is the value of the correction to apply to the hourly value of declination in section 3 of the pro-forma. If the hourly value of declination is increasing, then the correction is added. If it is decreasing, then it must be subtracted.
- Using the information obtained so far, calculate the value of the “calculated altitude” using the formula indicated in section4 of the pro-forma. Enter this value next to “Cal alt” in section 6 of the pro-forma .
- Using the observer’s DR latitude and the LHA of the sun, look up the value of “A” in the A, B, C tables of “Nories”. Enter this value next to “A” in section 5 of the pro-forma. Add either a “N” or a “S” after the value depending on the name of the latitude. If the latitude is south, write “N” (opposite of the latitude). If the latitude is north, write “S” (opposite of the latitude).
- Using the declination and the LH of the sun, look up the value of “B” in the A, B, C tables and enter it next to “B” in section 5 of the pro-forma. Add either “N” or “S” to the value of B depending on the declination, ie “N” if the declination is north or “S” if the declination is south.
- Turn to the bottom of the “C” table in the A, B, C tables and follow the instructions for the determination of “C”. If the names of “A” and “B” are the same, then the two values are added to give “C”. If they are different from one another, then the smaller is deducted from the larger. The value of “c” so obtained is named the same as the larger of “A” or “B”.
- Using the value of “C” as obtained on the pro-forma and the latitude of the observer’s DR position, enter the “C” table and obtain the value of the azimuth. The azimuth is named according to the name of “C” and the LHA (west if it is less than 180° or east if it is greater than 180°).
- Complete section 6 of the pro-forma using the sextant altitude of the sun as a starting point and convert it to a true altitude by applying the Index Error correction, Height of Eye correction (Dip) and the Total Correction obtained from the tables at the front of the nautical almanac. In the case of the Total correction, remember to enter the correct period of the sun’s altitude correction tables, ie either “Oct – Mar” or Apr – Sep”. Also remember to use the correct column, ie either “upper limb” or “lower limb”.
- Determine the difference between the True and Calculated altitudes by subtracting the smaller from the larger value. This will provide the intercept in nautical miles and the direction of the intercept, ie either towards the bearing of the sun or away from it. If the true altitude is greater than the calculated altitude, then the intercept is towards the sun. If it is smaller, then it is away.
- Plot the DR position on the appropriate Mercator chart. From this position plot the intercept as a bearing from or towards the sun. The length of this intercept will be equal to the difference between the true and calculated altitudes. At this latter distance from the DR position, plot the position at right angles to the direction of the bearing. Remember to place an arrow head on both sides of the position line.

Plotting a position line obtained from a sun sight.